How to Create a One-Page Website or Landing Page
Creating Site Step-by-Step
To create a one-page website or landing page, click on Landing Pages from the left sidebar and then click on the Build Landing Page or Create a Landing Page button.

The first step is giving your project a name, for example it could be “My Landing Page”. Then type a title of your page (this is for public view), fill out the meta description for SEO, and upload your own Favicon. Hit Save Settings when you are done. On other settings, you're also able to add custom domain, install Google Analytics or Facebook Pixel script, and set typography styles for your page.

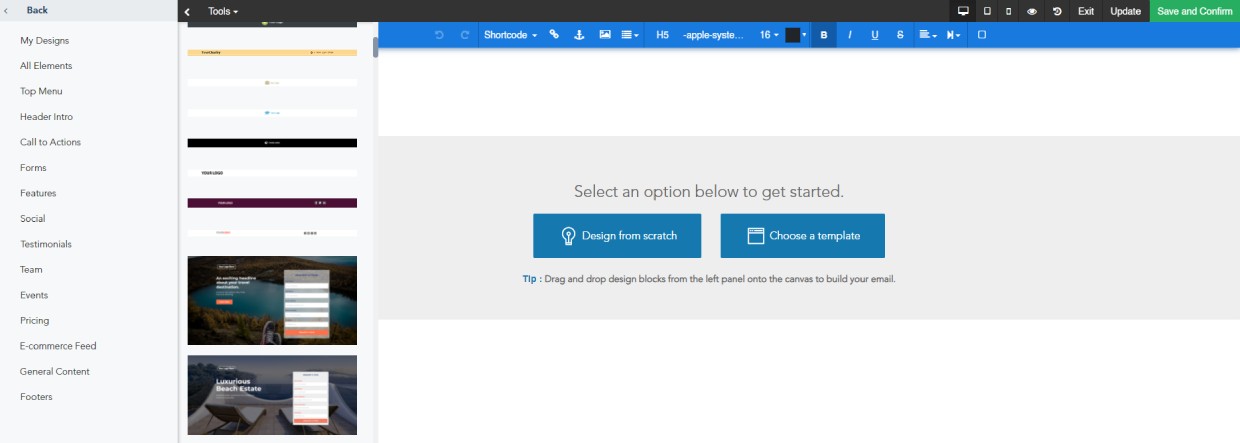
Next you can start building your one-page website or landing page by utilizing three options on the left menu.
1. Using Templates
This option will give you numerous templates of complete one-page page. You can simply drag-and-drop it into the content area on the right. Once you have done that, you are free to edit the content as you prefer.

2. Using Pre-Designed Blocks
You can select Pre-Designed Blocks. This will open another sub menu, namely blocks/sections that have been made according to their respective categories (i.e. Header, Top Menu, Forms, Footers, etc.). From there you can select whatever you need, and drag-and-drop those blocks into the content area.

3. Designing from Scratch
And the last option, you can create your own layout design by selecting Design from scratch or Design Elements. It will give you flexibility to choose elements that you need to build the website page.

After dragging the blocks to the right, you will see that each block or section has its own control at the top. You can use it for the following things:
Change the block position within the page (move up or down).
Undo/Redo your actions.
Access block settings. For example if you are using a form block, the settings window will allow you to choose the contact list that will be associated with this form.
View source code for current block.
Add filtering options to this specific block. You can for example assign particular audiences for this block so they only can see it.
Clone the block.
Remove or Reset state of current block.
Block Element Details
After you add a block, you are able to click on any element inside this block. For example, in a text element, the settings menu will open on the left sidebar, and it will allow you to edit the font family, size and color of your text. Similar settings will also open when you select an image element, you can upload a new image to replace it using the left sidebar.

Form Blocks
When adding a Form Block, it will automatically create a new list and link it to this form the first time you save the page. If you already have a list that you want to use, you can link it to the Form by clicking Block Settings first. Then click the Populate Form tab, and activate the option Use an existing email list.
Next you can select your list from the drop down menu and you can even hide/show certain fields in this list in the web form.

It’s important at the end to save your website page changes. It will automatically autosave versions of your page when you are making changes. This will allow you to fall back to different versions moving forward. However it’s really important that you save your page as a draft at least once.
Please note, after saving the page, there will be a moderation before the page can be fully published.
During moderation, the system will perform an automatic scan to avoid spam content and the moderation time will vary from minutes to hours.
Last updated