How to Create Forms and Contact Lists
Creating your lists is a fundamental step in marketing to maintain your visitors and customers. To get started, click on the Contacts option from the left sidebar and click Create List. Or select the Lists tab from the top, and click on the Create List button.

You will be prompted with a popup to insert basic list details, such as list name, sender email address (From email address), the sender name, and the reply-to email address. Those sender details are essential when sending a confirmation email for subscribers who sign up to your list. You can also add some details about this list to remind your users why they are receiving this email. After you are done with that, you can click on Create.
After you create your first list, you can build up the fields for records on that list using the Form Builder. To customize list fields go to your lists view, find the list you wish to configure and click on the actions –> Fields & Form.

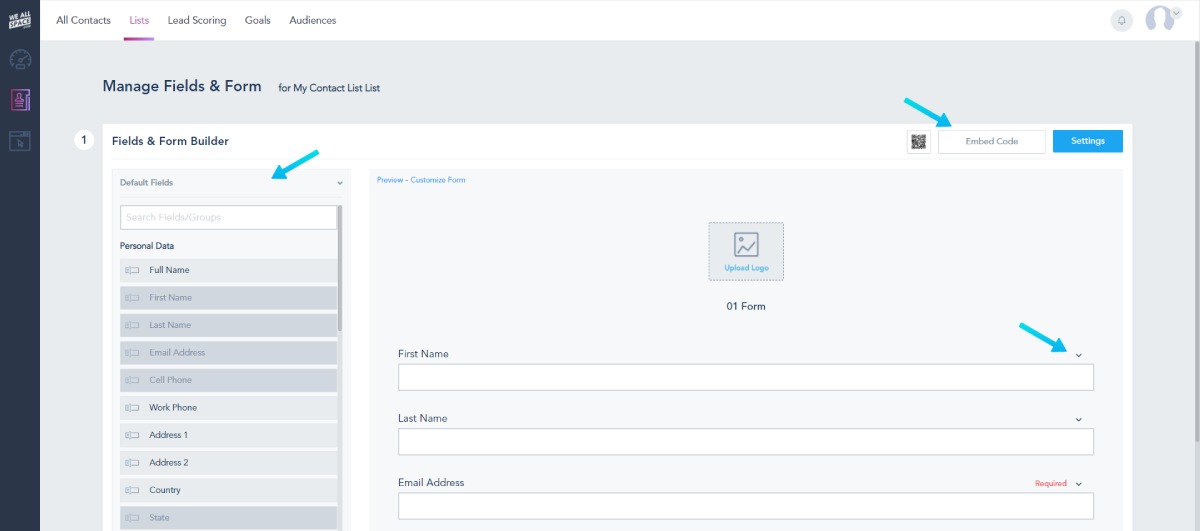
On the next page you will be able to edit your list/form fields by either adding new ones or delete/edit existing. To add a new field, you can single click on the type of field you’d like to add from the left options and it will automatically be added to the bottom of the form.
By default, each list will have some pre-made fields, such as First Name, Last Name, Email and Phone. You can rename each field, and specify whether they are required or not. To edit a pre-existing field, click on it and it will switch into edit mode so you can make your changes. Once you are done, just click on the field again to apply your changes. Once you complete all your edits, you can save your form by clicking on Save Form in the bottom right.
If you are planning on embedding this form on your website or any other web page, you can get the embed code by clicking on the Embed Code button in the top of the form settings page.

The next step is configuring the general list/form settings by clicking on the blue Settings button right next to the Embed Code button. This will allow you to edit the content of the email your subscribers receive when they sign up to your new list.
For example, you can choose the Subject line, edit your From, Reply-to and Name fields, and create the body of the email they receive. You can also edit the Success/Failure message they see right after they submit the form.
There are other settings that you can control from this page including whether you’d like to be notified of new sign ups (you can add multiple emails in here to be notified), and if you would like to turn the double opt-in on for your subscribers. You can choose to redirect the user after submission to a new page, such as a thank you page on your website or a landing page on your account. It is required that you hit the Submit button in the bottom right to save your changes.
Last updated